Ever received an email but weren’t sure if you could trust it? Of course you have. This blog provides some easy and then (moderately) technical instructions for inspecting a suspicious email. In the second part of the blog, we focus on what Microsoft 365 administrators can do to limit the amount of dodgy emails users get in the first place.
Introduction
Everyone in the world, if they have an email account, has probably received a suspicious email. For regular users, it’s often hard to know when to trust an email, and people can be torn between not wanting to miss something important and not wanting to make a cyber security mistake.
Too much phishing training and testing only involves testing the users themselves with tame phishing examples, but often the focus should instead be on the protections in place for user accounts and devices. Fundamentally, at some point people will be caught out by phishing or spam, and it’s not going to be their fault.
That said, what everybody should be able to do is apply some basic checks to all incoming emails - we cover examples in the next section. Following that is some more technical advice on the potential next steps for inspecting emails.
This whole blog should probably come with a similar warning to foraging for mushrooms - make sure you know what you’re doing before eating any emails. Jokes aside, the best thing most organisations can do for security is to foster a culture of never being afraid to ask for help or advice, so if you’re not sure about a given email, don’t hesitate to ask for help from a colleague, or your IT or security team. If you don’t have an IT or security team, you can always ask Red Maple.
Manually Inspecting an Email
The first thing to check is the email content, which is something everybody can do. This normally boils down to four things:
- Obvious warnings,
- The sender,
- The email body,
- Any links or attachments.
Let’s look at each of these in turn.
For more information, there’s good advice from the NCSC on how to spot a phishing attempt.
Warning Signs
Firstly, don’t ignore all the warnings put in place to help spot suspicious emails. If using Outlook and Microsoft 365, for example, external emails can be tagged in the inbox and flagged in the message itself (e.g. This sender blah@thing.com is from outside of your organization). And emails from new recipients are also flagged (e.g. You don't often get email from blah@thing.com). And whilst some legitimate emails do make it into Junk or Quarantine, most of the time an email is in there for good reason, like this attempt to spoof an email that purports to be from our CEO Rob:
The Sender
Secondly, have a look at the sender’s display name and their actual email address - they don’t match. We can see this in the above example, and here’s another example that went to Rob:
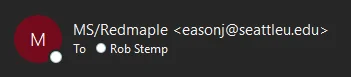
The first example tried to look like Rob, and in this email they’ve tailored the display name to try and look like Microsoft and Red Maple, but are using what is presumably a stolen email address to send it. So clearly this isn’t an email from Microsoft.
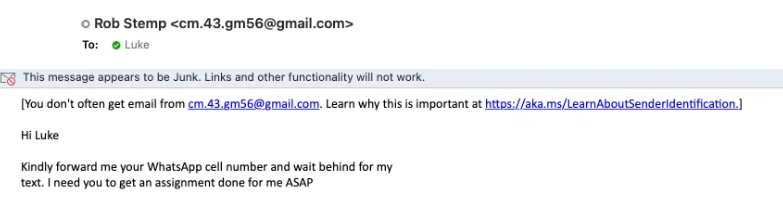
Here’s another obvious example, again featuring “Rob” (if you’re noticing a trend with these examples, executives or those with a more public profile will often receive and more spam, and impersonation attempts):
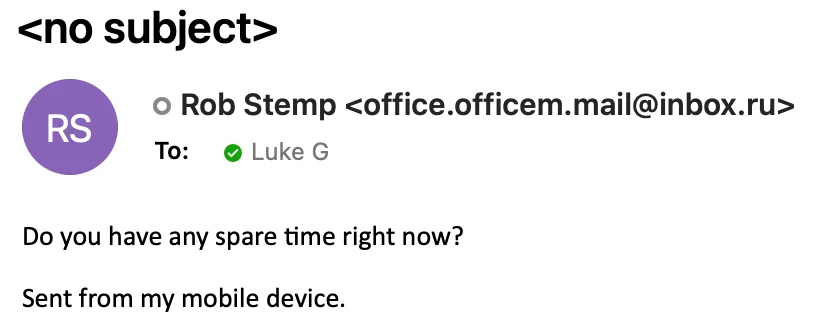
It’s clearly not from Rob. These kind of phishing emails are very common - they’re typically looking to start a conversation over email or WhatsApp, and will then try to, for example, persuade the victim to buy vouchers that can be easily transferred.
The Content
What the email says is obviously crucial. There’s probably a whole other blog on how to spot suspicious email content, but at a high level:
- Is the email itself expected? For example, did you ask for a document? Does the CEO normally ask staff to buy him Amazon vouchers?
- Is it making an unusual or particularly risky request? A classic attack is asking the finance team to change a bank account or make a new payment. Many of these attacks are very convincing, so maybe the best defence is to have a robust internal process for such changes. If in doubt, it’s always best to check with the sender via a phone call or message.
- Has it been written in the way you’d expect? Thankfully many spammers aren’t great at written English or at sounding natural in an email. Although as with many things, AI might make it easier for them. In the one example above, there’s clearly American English in use, for example.
Links and Attachments
Finally, does it contain any links or attachments? As most people now know, both should be treated with caution. It’s worth stating: Inspecting suspicious links and attachments is the riskiest thing we’ve suggested so far, so be careful.
Perhaps the easiest thing to do with suspicious attachments from people you know is to speak to them and check they actually sent it, and find out what it is. Ideally, this should be done without the use of the same email account, in case the account itself has been compromised. Attachments from unknown senders should be treated with the most suspicion.
A quick check of the file extension is sensible - macro-enabled documents differ from their regular versions. For example, .docm instead of .docx for macro-enabled Word documents. It’s probably best to never open a macro-enabled document received from anyone.
The next step might be to virus scan the document. You can do this locally with Windows Defender or other anti-virus products, or if you don’t object to sharing the document you could upload it to an online tool that runs lots of different checks, such as VirusTotal.
Unless you have macros enabled for Office (you shouldn’t do; it’s complicated) then in most cases opening a document shouldn’t be a risk in itself, but it’s still not what we’d advise anyone do.
Malicious attachments are still a common part of many cyber attacks, but links that take you to a fake login page are increasingly common, as stealing and selling passwords has become an industry in itself. Whilst dangerous attachments will contain malicious functionality that the attackers hope will run on your computer, malicious links are normally aimed at stealing your login details (username and password). Here’s an old example of a fake Microsoft 365 login page that a customer received in a phishing email:
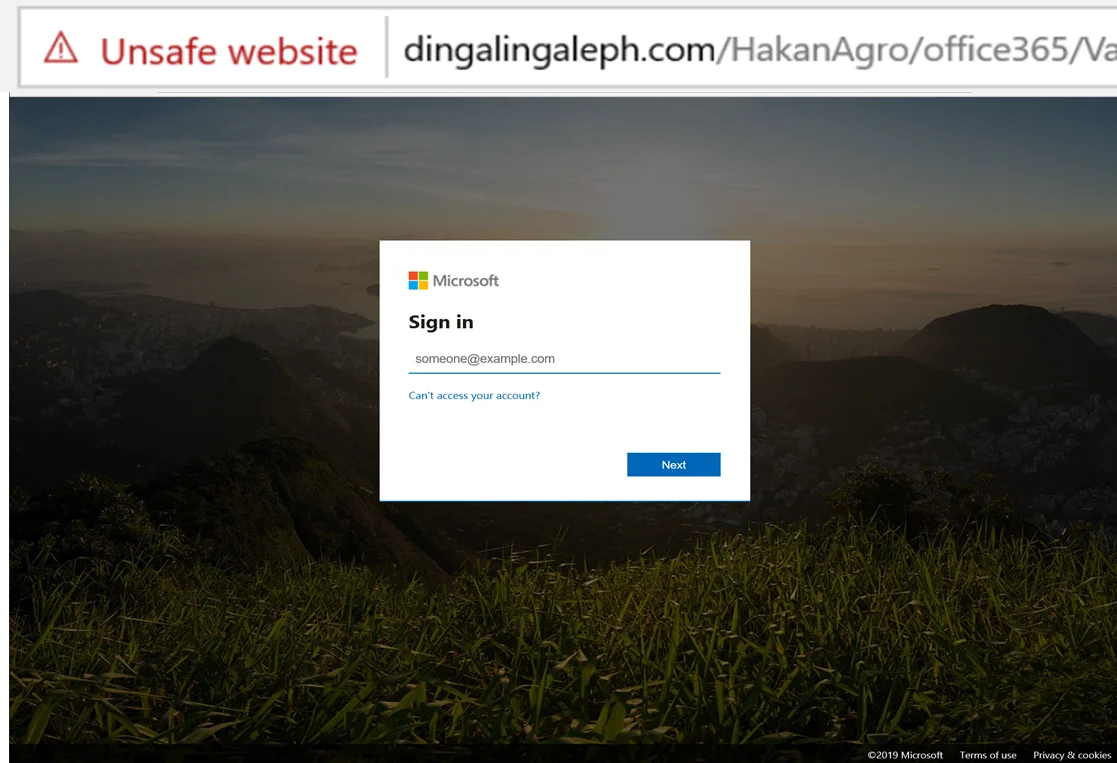
Thankfully many malicious sites will be blocked or taken down, sometimes before they reach your inbox in a suspicious email. If they are still live, many are easy to spot. The example above is clearly not a microsoft site, and has been flagged as unsafe by the browser.
Inspecting links is less risky than attachments, assuming your browser is up to date, you don’t enter any information into the site, or allow it to download or install anything.
If you’re using Windows, the Sandbox is a free tool that is a good place for looking at suspicious links or simple attachments, although as it doesn’t have any software installed by default then it can’t, for example, open Office documents. For more, see our previous blog on getting started with the Sandbox.
Inspecting Email Headers
Aside from looking at the email content, there is a moderately technical way for most email users to check an email themselves: by inspecting the email’s headers.
The headers are the metadata that arrive with an email message, which can tell us how it arrived in our inbox and from where it came.
Most email clients and applications allow you to view the email headers; this site has a good list of instructions for getting the email headers from various other email applications.
For example, in the Windows desktop version of Outlook, open the message properly, click File and then Properties (in the Info tab):

The box at the bottom contains the Internet Headers, which for this message from the excellent Risky Business starts with the following:
Received: from CWXP123MB2966.GBRP123.PROD.OUTLOOK.COM (2603:10a6:400:34::14)
 by LO0P123MB4218.GBRP123.PROD.OUTLOOK.COM with HTTPS; Wed, 14 Jun 2023
 04:33:56 +0000
Received: from LO4P265CA0130.GBRP265.PROD.OUTLOOK.COM (2603:10a6:600:2c6::19)
 by CWXP123MB2966.GBRP123.PROD.OUTLOOK.COM (2603:10a6:400:34::14) with
 Microsoft SMTP Server (version=TLS1_2,
 cipher=TLS_ECDHE_RSA_WITH_AES_256_GCM_SHA384) id 15.20.6477.37; Wed, 14 Jun
 2023 04:31:33 +0000
Received: from LO2GBR01FT010.eop-gbr01.prod.protection.outlook.com
 (2603:10a6:600:2c6:cafe::b9) by LO4P265CA0130.outlook.office365.com
 (2603:10a6:600:2c6::19) with Microsoft SMTP Server (version=TLS1_2,
 cipher=TLS_ECDHE_RSA_WITH_AES_256_GCM_SHA384) id 15.20.6477.37 via Frontend
 Transport; Wed, 14 Jun 2023 04:31:33 +0000
Authentication-Results: spf=pass (sender IP is 159.112.244.19)
 smtp.mailfrom=mg2.substack.com; dkim=pass (signature was verified)
 header.d=mg2.substack.com;dmarc=pass action=none
 header.from=substack.com;compauth=pass reason=100
Received-SPF: Pass (protection.outlook.com: domain of mg2.substack.com
 designates 159.112.244.19 as permitted sender)
 receiver=protection.outlook.com; client-ip=159.112.244.19;
 helo=m244-19.mailgun.net; pr=C
...
Once we have them copied we can analyse the headers. We can do this, for example, in Microsoft’s Header Analyser (which is also on GitHub), or Google’s Message Header tool, or with any of a bunch of other online tools.
Paste in the headers and hit analyse. The initial fields are all the regular information you might expect: the sender, recipient, subject etc. After that we get into the interesting technical information that can tell us a few things. For starters, all the authentication headers:
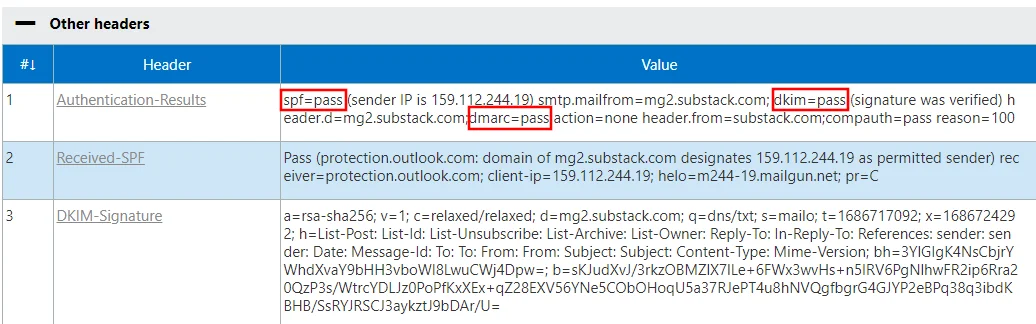
Here it’s all good - we have a pass for SPF, DKIM and DMARC. This should almost be a given if your email server settings are set up properly, as an egregious fail on most combinations of these things should put an email into junk or quarantine. Although as we’ve found before, not everyone has their email configuration completely sorted.
Another interesting field is the Return-Path. For our Risky Biz email, as we might expect for a newsletter, it’s a bounce notification for substack:

This field is often automatically added by the sender’s email server as a way of collecting bounced emails, and is often a quick sign that the purported sender has been forged. For example, if the return path is an entirely different domain to the sender’s address, it’s very suspicious.
A Nice Shortcut
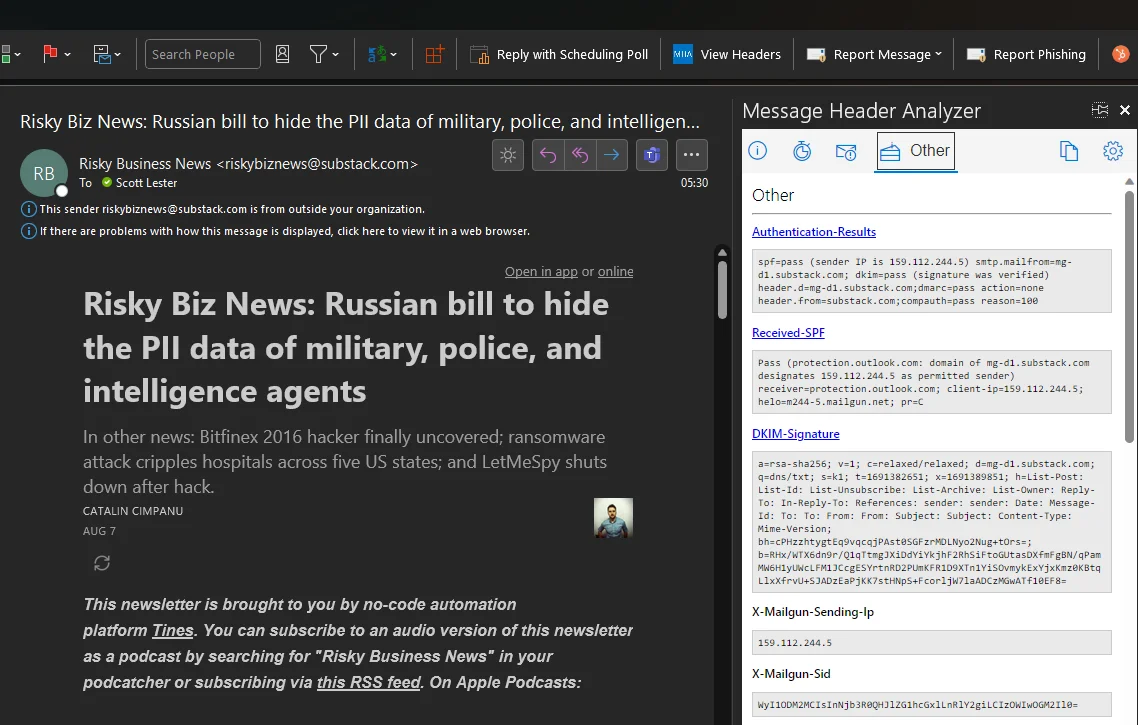
A quicker version of this process uses the View Headers add-in in Outlook, which shows the parsed headers in Outlook itself:
Conclusion
In this blog we’ve shown some ways in which everyone can inspect suspicious emails, and hopefully approach the problem with some well-placed confidence. In the next part we focus on Microsoft 365 administrators, and what they can do to stop malicious emails getting to users in the first place.
- Microsoft 365 Email Protections
- Are your domains protected from spoofing and phishing attacks?
- Email Security - The Basics

|
Scott is a technical cyber security professional with over fifteen years’ experience across a broad range of roles within the public and private sectors. With a deep understanding of cyber security, he has in his career focused on applied cryptography, network technologies, digital forensics and security research. At Red Maple he leads the delivery of all of our cyber security services. |