A recent report has confirmed what many of us suspected: unmanaged devices are still very common amongst many companies around the world. For those on Microsoft 365, the native option for device management is Microsoft Intune, which comes with some Microsoft 365 licenses. This two-part blog details all the basic and intermediate things you’ll need to know to get started with Intune, but still only covers a proportion of all that Intune can do.
Introduction
The Risks
Most recently, this report from Kolide, who sell a device compliance tool, found that 47% of companies allow unmanaged devices to access company data. The report has some interesting tidbits:
- Using personal devices is more common for executives/directors/managers.
- It’s most commonly for email or chat applications.
- It’s most often justified with “I like my [personal] device better”
All of which make sense to me - unfortunately the same people who are often targeted the most are also most likely to be allowed to break the rules or get special treatment.
When it comes to risk, the main assumption here is that personal devices are going to be less well managed, and therefore less secure, but there’s also the issue of control; you can’t wipe company data from the unmanaged devices of a rogue employee, or from an lost, unmanaged device. There have been some very public examples of the compromise of personal devices affecting a company, most recently including the hack of LastPass.
Benefits
For many oganisations the primary end goal would be to block access for unmanaged devices to key Microsoft 365 resources such as email and SharePoint sites. There’s also the added benefit of centralising device management (and defence, if Defender is also being rolled out) in one place.
And then there’s price; upgrading to Business Premium licenses, which include Intune and Defender for Business, can be cheaper than a third-party device management software and a separate anti-virus/endpoint defence product. This is what we did at Red Maple - previously we had Hexnode (which is a good product) and a third-party AV product (which wasn’t great), but moving to Business Premium was half the price per user compared to the two other products.
Price isn’t everything, of course. There may well be features in third-party AV or device management products that are better that those in Defender and Intune. For example, JAMF seems to better handle macOS devices. Whilst it does feel a bit sad to give in to the Microsoft monopoly, Intune and Defender for Business are good products.
Finally, for Bring Your Own Device (BYOD aka personally owned work) devices, company management can actually provide a better, more convenient experience for users. For example, the work profile on Android nicely separates work applications in a separate app tray:
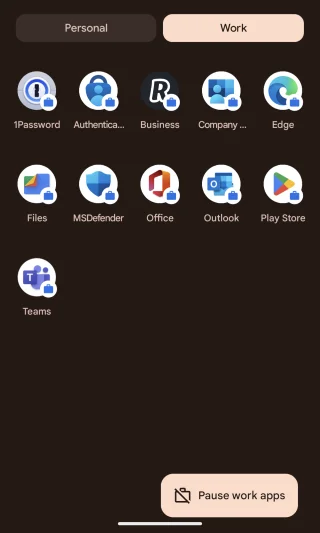
And all the work apps can be disabled with a single button, which is nice for silencing notifications and enforcing a bit of work-life balance.
Key Concepts
Let’s start our coverage on Intune by first explaining some key concepts.
Enrolment
To join a device management system means enrolling the device. This can either be done from a clean start, i.e. the first time the device is switched on, or on a device that’s already in use. Crucially, the enrollment method can affect what can be done to control the device, so there are some advantages in enrolling new devices.
A common phrase worth understanding is zero-touch enrollment, which means being able to automatically register a device for company management straight from purchase. This means it can be sent directly to the user without first having to go to IT for registration. It can be done with Apple Business Manager, and with lots of OEM Windows laptop suppliers via Autopilot (e.g. from Dell). The other bit of relevant jargon is OOBE, or Out of Box Experience, which is what the user gets when they first turn on the device.
Finally, devices assigned to an individual have user affinity, shared devices do not.
Ownership
With device management it’s key whether a given device is company or personally owned. In some enrollment paths it asks for the user to confirm, but for some enrollment paths devices will by default be registered as personally owned, which often affects what policies and protections are applied to it. Encouragingly, there are additional privacy measures for personally owned devices. For example, Intune won’t collect the phone number of a personally owned phone or tablet.
Windows Device Joining
Focussing on AzureAD (aka Entra), the key difference between the two ways of joining a Windows device are whether the user account on the device is a corporate Microsoft account or not:
-
Azure AD Registered- aka “Workplace joined”, is designed for BYOD devices that are allowed to access company resources. Crucially, the user account on the device is a local account or a personal cloud account (e.g. a personal Microsoft account). This means that administrators can’t always reset the local user account password, but it does still support single-sign on for M365 resources once the user has logged in. Management-wise, it allows support for basic security compliance. See this Microsoft page for more. -
Azure AD Joined- in this case the device account is a corporate Microsoft 365 account with a local password/PIN that can be reset from the lock screen by administrators. It’s a fully managed device, so all remote management options are available. See this Microsoft page for more. -
P.S.: There’s also
hybrid joined, which means devices “are joined to your on-premises Active Directory and registered with Azure Active Directory”, as detailed here).
iOS/iPadOS Devices
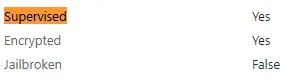
For Apple mobile devices, there is supervised mode, which allows Intune greater control over the device, particularly when it comes to Apple functionality. This page lists some of the settings that are only viable for supervised devices, for example blocking the App Store and iCloud backup.
It’s important to note that supervised mode must be enabled during the Intune enrollment process, as it can’t be enabled afterwards without resetting the device.
Whether a device is supervised is noted in the hardware tab of the device properties in Intune:
Pre-requisites
Apple Devices
Unsurprisingly, if you want to use Apple devices with Microsoft Intune, things will be more complicated than with Windows computers. To support everything such as zero-touch enrollment and licensed software, you’ll first need an Apple Business Manager account. To register for this in the UK, you need your company’s DUNS number and your VAT number.
Additionally:
- You’ll need staff to only use Apple IDs associated with the Apple BM account, and you can’t transfer existing accounts (or their purchased apps) across.
- You’ll also need to add your Apple customer number or reseller number if you want devices purchased through managed Apple IDs to be automatically added into the system.
For managing apps, you’ll also need to connect the Apple Volume Purchase Program with Intune, more on which later.
If you don’t need automated enrolment or management of Apple App Store purchased apps, you can skip ABM and individually enrol Macs and iOS devices.
Google Enterprise
For managing ChromeOS you need to setup the Chrome Enterprise connector, which requires a (paid-for) Chrome Enterprise subscription.
Groups
User/Device Groups
All compliance and configuration policies, and apps, and pretty much everything else in Intune, all need to be assigned to devices, users or groups in order to take effect. A convenient way to manage this is with Microsoft 365 security groups. It’s a little more tricky to manually add devices to groups, so an easier first approach is to assign users to groups based on their devices. For example, we have:
- Intune Android business owned
- Intune Android BYOD
- Intune iOS business owned
- Intune iOS BYOD
- Intune Windows
- Intune Shared Windows devices
- Intune MacOS
Giving all the groups a consistent prefix means they’re all together in the group list, hence Intune XXX in our groups.
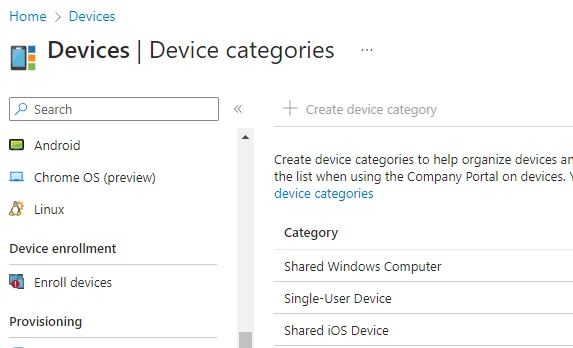
Device Categories
The user group approach does assume that a users don’t have more than one of each kind of device. To help further differentiate devices, during enrollment you can have users select the kind of device they are enrolling by configuring device categories in (this Intune panel). For example, we use it to distinguish between single-user devices and shared devices:
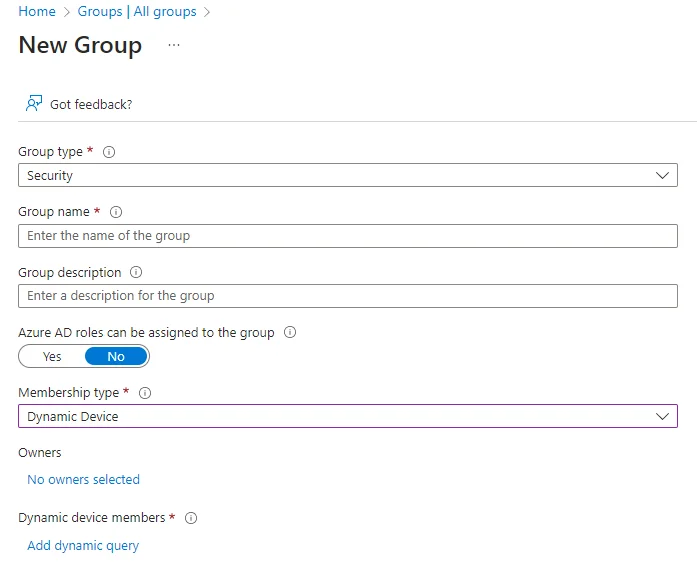
Automatic Groups
Finally, as per these instructions, you can also create dynamic device groups:
Checklist For Starting up
Before getting started with any kind of device management some decisions need to be made, and potentially reflected in company policies. For example:
- If a member of staff doesn’t want company software on their personal phone, which is a reasonable position particularly for the privacy conscious, do we get them a company phone or accept that they won’t need a phone?
- What functionality do people genuinely need from their devices? Security is always a balance between restrictions and functionality.
- What applications does everyone need, and how are the licenses deployed and managed?
- Can devices be assigned to individuals, or is there a need for shared devices?
Then we get to configuration - brace yourself. Each of the following are likely required per device platform (i.e. Windows, MacOS, Android and iOS), and there’s no duplicating policies across from one platform to another. Some things (ahem, Apple devices), as detailed above, require additional integration steps.
- Set up enrollment.
- Set up device configuration policies.
- For BYOD devices, configure app protection profiles.
- Set up device compliance settings.
- Add apps for devices
- Configure the endpoint security settings in one of Intune or Defender, for all platforms.
- (Optionally) setup any scripts you need to perform other device actions.
- Put the device or user into appropriate groups, against which the policies and configuration are assigned.
- Assign it to a user, or leave assignment to the enrollment process (if using
user affinity) - Enroll the device.
We’ll cover lots of detail on these steps in the next blog part…
- Getting Started with Microsoft Intune - Part 2
- Welcoming Guests in Microsoft 365
- How to Avoid MFA Mistakes with Microsoft 365

|
Scott is a technical cyber security professional with over fifteen years’ experience across a broad range of roles within the public and private sectors. With a deep understanding of cyber security, he has in his career focused on applied cryptography, network technologies, digital forensics and security research. At Red Maple he leads the delivery of all of our cyber security services. |